How to Downgrade from Windows 11 to 10 Without Losing Data: 2 Simple Ways
5 min read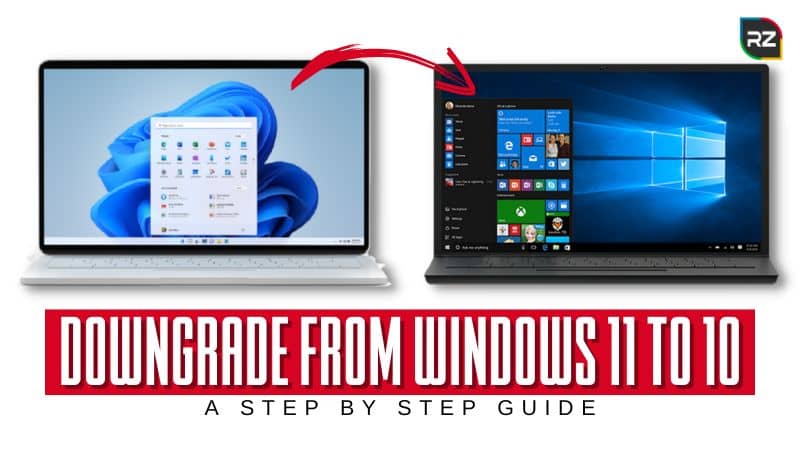
Have problems with your new Windows 11 upgrade and want to downgrade from Windows 11 to 10? Don’t worry. We have got you covered.
Today we will discuss the steps to remove Windows 11 and downgrade your system back to Windows 10 without losing your precious data.
Windows 11 is the newest, modified operating system offered by Microsoft. It was released on October 5th, 2021. With Windows 11, Microsoft has offered many new and amazing features to Windows users.
But even with the advanced features of Windows 11 people are having serious trouble with their operating systems (OS).
The good thing is that under Microsoft’s 10 days policy, one can easily go back to the Windows 10 version.
However, there is also a way to extend the deadline and degrade after 10 days.
Stick with us until the end of this guide to know how to downgrade from Windows 11 to 10.
You may also read: Fix Windows 11 Common Issues.
How to Downgrade from Windows 11 to 10
Most laptops and new PCs come with preinstalled Windows 11 OS. Their hardware was specially designed in a way that makes the system compatible with the latest OS.
Due to that, many people are concerned if they can downgrade Windows 11 to 10 new laptop.
The answer is yes. Even if you bought a new laptop or PC and don’t want the preinstalled Windows 11 on your device, you can degrade it within 10 days of purchasing.
And, if you have upgraded the device’s OS to Windows 11 and want to go back, we suggest creating a backup of your important data first.
It’s because downgrading the system will clean all the previous data present on the device. However, there’s a way to save the data even after the deadline.
That said, below we’ve discussed two different approaches to downgrade Windows 11 to 10 new laptop or old existing laptops. Let’s have a look at them one by one.
Also read: What’s New in Windows 11 22h2 Version.
Downgrade Windows 11 to 10 Without Losing Data Within 10 Days
If you upgraded your system in fewer than 10 days then there will be no major changes in the system.
Now, follow the steps that we have mentioned below to downgrade from Windows 11 to 10 on new laptop or after a recent upgrade.
- Go to Settings on the device and open the “System” option.
- Now, go to Recovery options where you see a “Reset this PC” option.
- Click on the “Reset PC” and just after a “Go back to Windows option” will appear.
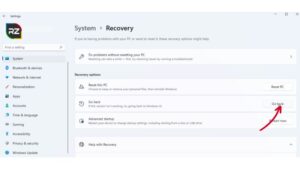
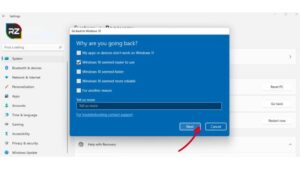
- Here, select any reason you like and click on “Next”.
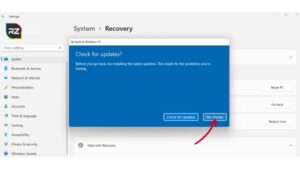
- In the next window, a “check for updates” option will appear. Don’t check it just click on “No thanks” and move forward.
- Now the next Windows appears, make sure you read the information given on the screen clearly and click on the “Next” option again.
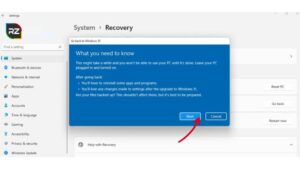
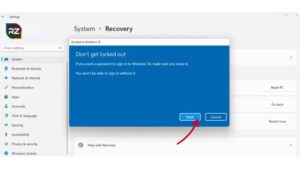
- After that, a window will appear that warn you not to forget the Windows password. Just click on the “Next” option and move forward.
- Finally, a “Go back to Windows” option will appear, so just proceed with that.
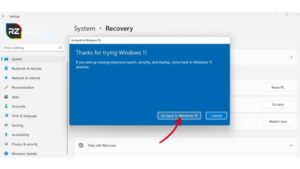
- The system will restart and attempt to recover the installation.
- After some time, your system will again restart with a Windows 10 boot screen.
- Now, log in with the password if you ever used one. Here, you can see the Windows 10 version running the winver command.
Thus, after following these steps properly your system will downgrade to Windows 10 nicely and smoothly.
Now the question is how to downgrade from Windows 11 to Windows 10 after 10 days without losing data. What should we do if downgrade Windows 11 to 10 go back not available?
There is nothing to worry about. One can easily Downgrade from Windows 11 to 10 even without losing any data. Head to the next section to get the answers to your questions.
You should also read: Windows 11 S Mode Good or Bad?
Downgrade Windows 11 to 10 After 10 Days
Since it’s been more than 10 days, the method discussed above won’t work. The only way to go back to Windows 10 is to “clean and install” the operating system.
This will erase all your device’s data and give you a fresh start. The easiest way to do this is to create a Windows 10 installation media by using a USB flash drive.
Follow the steps to downgrade Windows 11 to 10 using USB flash drive:
- Put your USB drive on your Windows 11 and then go here.
- Under the heading, click on download tool now to “create Windows 10 installation media“.
- Run the “media creation tool” and follow the instructions to create bootable Windows 10 installation media using a USB flash drive. Make sure not to unplug the Windows 11 PC.
- Now go to settings and search for system. In the system, go to the recovery, and click on “Restart now” in the advanced startup heading.
- In the Windows 11 recovery menu, select “Choose a device” and select your USB.
- Now, tap on the spacebar to start the Windows setup when you see the prompts to boot from the USB drive.
- Now, follow the on-screen instructions to install Windows 10
- When you reach the step where you have to enter a product key, select “I don’t have a key“, and be certain to choose the home or pro edition you are downgrading from.
- After the completion of the installation, boot your device to Windows 10, and the operating system will follow your lead and activate automatically.
- In the end, install the latest updates and download some drivers from the Microsoft website. Once you restore the data files and reinstall the apps, you are good to go.
Hence, these are the two simple solutions for the query of how to downgrade Windows 11 to 10 without losing data.
Conclusion
Windows 11 has indeed brought a new fresh look with various effective and unique features to Windows OS.
But it’s also true that it has given more problems than benefits that it provides to the users. That leads many users to downgrade from Windows 11 to 10.
Certainly, the good thing is Microsoft has given users an option to revert back directly from Windows 11 to Windows 10 within 10 days of after upgrade.
In the above section, we’ve discussed the solution to the most searched query of how to downgrade from Windows 11 to Windows 10 after 10 days without losing data.
Follow the steps (instructions) carefully and get back Windows 10 OS in your system.
We hope this guide has given complete information. If you have any questions, feel free to ask them in the comment section.
