Error 0xC1900101 – 0x40017 in Windows 11 Update? Find How to Fix!
7 min read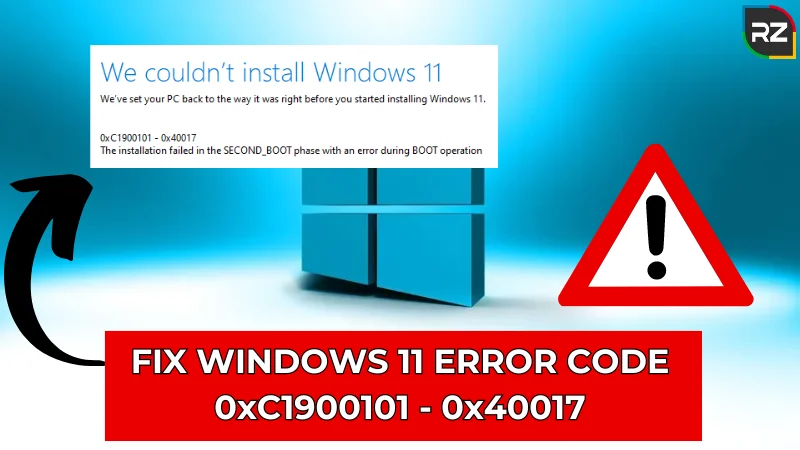
While upgrading to Windows 11, some Windows users are facing issues like error code 0xc1900101 – 0x40017.
These types of problems can occur frequently because there can be many technical issues & glitches that can cause problems in attempting to install the new updates.
However, issues like 0xc1900101 – 0x40017 in Windows 11 are often minor problems as they can occur due to some basic or minor faults, such as insufficient disk space, anti-virus software, driver-related issues, system efficiency to handle the update and performance, and other similar issues.
So, if you are also facing problems upgrading to Windows 11 like encountering error code 0xc1900101 – 0x40017 while performing the update, here we’ll explore some of the effective ways and methods to resolve the issue and provide you with hassle-free step-by-step solutions.
How to Fix Error Code 0xC1900101 – 0x40017 in Windows 11?
Before moving further to fix the 0xC1900101 0x40017 error in Windows 11, remove external storage devices.
Also, backing up all your data is advisable to avoid any problems. This way in case the fixes don’t go your way, you can always restore all of the data and have a clean start.
Now, try the following tips to resolve the issue 0xC1900101 – 0x40017 in Windows 11 update.
1. Manually Perform the Updates and Fix Corrupted Drivers
Error 0xC1900101 – 0x40017 usually occurs due to driver-related issues.
That’s why while facing problems upgrading to Windows 11, the first thing you should do is manually update and fix or reinstall the corrupted device drivers.
Follow these steps to fix driver-related issues:
- Right-click on the start button and open the device manager.
- In the Device Manager window, look for any devices with a yellow exclamation mark next to them. This mark indicates a problem with the device. The device with the yellow exclamation mark is likely causing the 0xC1900101 error.
- Update the driver which is causing the problem. Right-click on the driver and update it.
- Search for the drivers automatically to find the needful and potential drivers to install the updates.
Furthermore, you should also check for updates of other drivers by following the same process. All the drivers should be up-to-date to perform the update installation of Windows 11.
Adding to it, there’s an alternative way to perform this step to remove that specific driver by clicking on Uninstall device and rebooting the PC to install the driver automatically.
After performing these steps, 0xC1900101 – 0x40017 error in Windows 11 should be resolved.
2. Check If Disk Space is Enough to Handle the Update
Before upgrading and installing the newest version of Windows 11, you should ensure there’s enough disk space to install the update smoothly.
Microsoft specified that there should be at least 64+ GB of disk space required to install Windows 11, and it may require more to run the specific requirements.
Thus, if you are facing this error, there might be a chance of inadequate disk space to install the update.
To tackle the problem, there are many methods to free up your storage space. Follow these steps to fix the problems while upgrading to Windows 11:
- Delete temporary files and unnecessary data.
- Uninstall unnecessary applications.
- Enhance system partition.
- Change the virtual memory size before the update.
- Install an SSD or HDD of a larger capacity to operate the system.
- Run disk cleanup to ensure sufficient disk space: Open Disk Cleanup>Select Drive>Select Files>Clean System Files.
Ensuring enough disk space might help fix the 0xC1900101 0x40017 error, but if the problem continues, you should try the following methods.
3. Running SFC Scan
Corrupted system files can cause an error upgrading to Windows 11. So, to solve and fix 0xc1900101 0x40017 in Windows 11, running the SFC scan helps in repairing corrupted files. To run the scan, follow these steps:
- Search cmd from the start windows button.
- Choose run as administrator from the menu options.
- In the command prompt, type sfc /scannow and press enter.
- Wait for the process to complete, then restart your computer.
Once the process is over, corrupted system files will resolve, or they will be replaced by the correct copy from the system32/dllcache folder.
This will solve the problem after successfully processing these steps. If this doesn’t work, running the DISM scan would help as it’s more capable than SFC.
4. Running DISM Scan
It’s quite a similar option to a SFC scan, but it is said that DISM is more capable of resolving the issue. Follow the steps below to see how it works:
- Search cmd from the start windows button.
- In the Command Prompt window, type DISM /Online /Cleanup-Image /RestoreHealth and press Enter.
- Let the tool run and fix any corrupted files.
- When it’s done, restart your computer.
- Try upgrading to Windows 11 again.
The issue should be fixed after a successful scan. If not, you should try other methods.
5. Check Disk
If the issue continues after the SFC and DISM scan, using a check disk can solve the problem.
Check disk scan helps in fixing any corrupted system files. Check Disk scans the files and fixes all the files that have issues.
It can also repair some damaged areas of the disk and mark severely damaged areas, so they can’t be more usable.
Follow the instructions to fix corrupted files:
- Like SFC and DISM scans, Search cmd from the start windows button.
- In the Command Prompt window, type chkdsk C: /f /r, and press Enter. (Replace “C” with the letter of your drive if your operating system is on a different drive.)
- Let the tool run and fix any corrupted files.
- When it’s done, restart your computer.
- Try upgrading to Windows 11 again.
See if the issue gets resolved or not. If the problem continues, try troubleshooting.
6. Run Windows Update Troubleshooter
Problems with the hardware can also be the reason for having problems installing Windows 11.
Detect and resolve the issue by running the Windows update troubleshooter. It might help in detecting why the Windows 11 update fails and will guide in rolling back the system. Follow the instructions to run troubleshoot:
- Open settings and go to update and security options.
- Click on troubleshoot from the left menu.
- Now, click on hardware & devices from the right side.
- Run the troubleshooter and wait for the results.
- Now, select & fix the issues (if any).
If there’s a problem with the hardware, the issue should no longer exist. But if there were no issues with the hardware, follow the other methods.
7. Removing Antivirus Software from Your Device
Sometimes error 0xc1900101 – 0x40017 in Windows 11 occurs because of an antivirus software installed on your device. There might be some files that the antivirus doesn’t allow to be installed on your system.
That’s why to fix the issue, you can try uninstalling the particular antivirus to upgrade Windows 11 smoothly. To remove the antivirus, follow these instructions:
- Go to the control panel.
- Choose to uninstall a program.
- Select the antivirus software, right-click on it, and uninstall the file.
- Now, follow the guidelines to uninstall the software which varies according to the antivirus.
After that, the issue may get resolved if problems were present due to the antivirus software.
If the problem is caused by another software or any other tools, follow the same process to get rid of the issue.
8. Update BIOS
There might be a chance you encounter problems updating to Windows 11 because of outdated BIOS. However, it’s a complicated process that can cause other problems, if it isn’t done properly.
So, to upgrade the BIOS correctly, follow the given instructions:
- Go to the official website of your PC (for instance, HP driver and software download website in the case of HP), which will vary according to the manufacturer.
- Select the type of computer you are using.
- Enter the exact serial number or exact model of your computer.
- Click on All drivers and check the BIOS for the available updates.
- Download the updates (if available).
- Install the downloaded file(.exe).
- Now, restart your PC and select Apply Update Now during the start.
These are some of the practical methods that can fix the error quickly by putting a little effort in the right direction.
If you are facing any problems upgrading to Windows 11, trying out and implementing the above methods can fix the issue.
But if the problem continues, resetting the computer, connecting to Microsoft officials, or seeking a professional/technician’s advice might provide the best solution.
Final Note
Fixing error 0xC1900101 – 0x40017 in Windows 11 is a minor issue but can be frustrating sometimes. Plus, it can be tricky to solve if you don’t know the exact issue and problems from where it is coming from.
But if we follow the basics and take steps correctly, we can easily tackle and fix the error, and installing Windows 11 can become a painless process.
As we have discussed above, the error 0xc1900101 – 0x40017 often appears due to driver-related issues. So, we must find and resolve all the driver-related issues first.
But if the issue continues, you should completely reset your PC to factory settings to remove all the problems your PC is facing regularly.
Besides this, if you are unable to fix the problem, it’s time to get support from the Microsoft help center and professional technicians who can guide you professionally and guide you about the steps to get rid of this Windows issue.