How to Check GPU Temperature in Windows 11 Computer
5 min read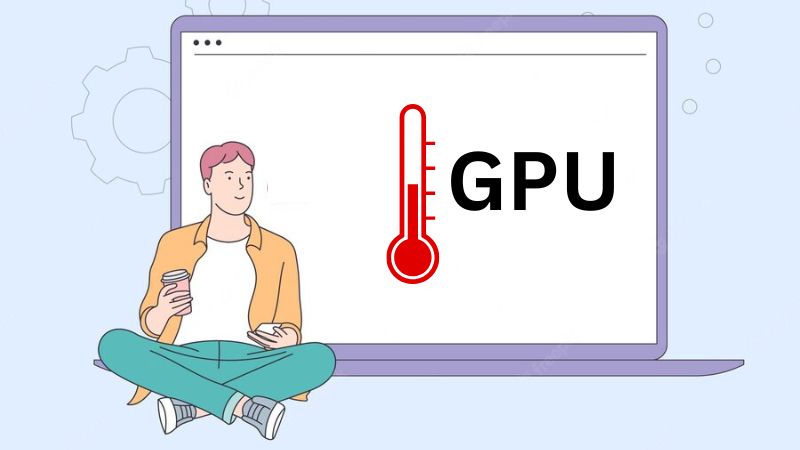
Need to know how to check your device’s GPU temperature? This guide will help you with the ways to check GPU temperature in Windows 11.
If you have a laptop/PC, you must have heard a fan spinning sound in your device. Well, it’s totally normal to hear that, especially while playing games or using heavy software.
The laptop or PC you use contains fans to balance the thermal levels of the device by controlling the flow of air. This prevents the device from suffering lagging and performance throttling because of overheating.
In case you’re dealing with a problem, here we got a solution for you. But first, have a look at the points why is monitoring system GPU temperature important.
After that, we’ll discuss how to check PC temperature GPU and then find a way to reduce the overheating and fix the issues that it caused.
Why is It Important to Check GPU Temperature in Windows 11?
Whether you are using a new Pentium class dual-core processor or any old processor, the hardware overheating problem is common in all of them.
Of course, big technology companies have come a long way from making big heavy desktops to compact laptops.
Moreover, they have also used many different ways, like the liquid cooling system, to cool down the device’s temperature.
But they haven’t come up with a permanent solution that can completely stop the processor from heating in the first place.
So, you must know what happens when a system gets overheated. Here is what you should know!
- The device’s hardware starts to degrade faster.
- The system starts to get lag or stop for a few minutes.
- All other technical components of the device also fail faster.
- Ultimately, the system suffers permanent damage if this overheating is not resolved in time.
Now, you know the issues that you’ll face when you face overheating problems in your computer. So, it’s time to look at how to check GPU temperature in Windows 11.
You should also read: Fix Windows 11 Common Issues- Easy & Simple Steps.
Ways To Check GPU Temperature in Windows 11
Checking the GPU temperature of your computer is not that hard. Several manual ways and even some software can help you check GPU Temperature in Windows 11.
All you have to do is to follow this guide to the very end.
#1. Check GPU Temperature from Task Manager
The newest Windows versions have developed special features that allow users to check the GPU temperature without using third-party software.
Follow the steps to monitor and check GPU temperature.
- Get to the “Search” option (in the bottom left corner of the Windows) and type “Task Manager“.
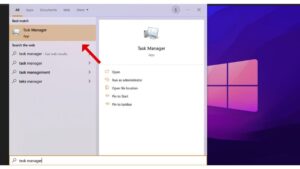
- After that, click on the “Performance” tab.
- Now. select the “GPU O” option present in the left pane.
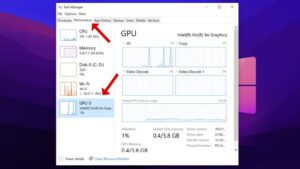
- Here you will see every GPU information, including the temperature.
Moreover, after completing all these steps properly, the task manager will show you the GPU temperature in Celsius format. This is one of the best and easy ways to Check GPU temperature in Windows 11.
#2. Monitor GPU Temperature with UEFI BIOS
Every Windows 11 system supports UEFI BIOS. With the help of BIOS features, we can check the GPU temperature.
BIOS is an essential part of any computer, and any wrong setting during monitoring can create more problems. So, we suggest not trying this way until you know your actions.
Follow the below steps to complete the process:
- Search for “MSI laptop BIOS key” for laptops and “MSI motherboard BIOS key” for desktops.
- After getting the key, Reboot your desktop/laptop.
- Press the Boot Menu Key that we searched for before the system boots up.
- The BIOS will Show Up on the screen.
- Reboot your system while pressing the “Shift” key.
- The windows will shut down and open with a “Please Wait” text on the screen.
- After that, three options will pop up. Choose “Troubleshoot” and move forward with the process.
- Now, select “Advance Options” on the screen.
- Choose the “UEFI Firmware Settings” to enter the motherboard BIOS Section.
- Then, click on the “Restart” button or press the “Enter” key.
- Select “Advance Option” from the top menu and then click on the “Hardware Monitor” option.
- In the end, look for the words like “Monitor” or “Temperature” in the BIOS menu, where you can view the temperature of the internal components.
This method also helps you check GPU temp Windows 10and all versions of Microsoft windows.
Apart from these methods, you can also use some GPU temperature check software to monitor the device’s temperature.
You may also like: Fix Windows 11 Missing Taskbar Icons.
GPU Temperature Check Software
Here are some of the popular third-party software to monitor your GPU Temperature in windows 11, including:
- HW Monitor
- GPU-Z
- Sidebar Diagnostics
- Open Hardware Monitor
- MSI Afterburner
You just need to simply download and run any of this software and follow the on-screen instruction instructions to easily check the temperature of your device’s GPU.
Conclusion
GPU overheating is a common problem for many desktop or laptop users. This overheating issue can crash your computer.
Moreover, in the worst-case scenario, GPU overheating can damage your hardware and other technical components of the system.
Sadly, there is no permanent solution to this. But to maintain the system’s optimal performance, one has to maintain the average GPU temperature and prevent overheating. For that, you must monitor the temperature regularly.
That said, we’ve discussed a step-by-step guide to check GPU temperature in Windows 11.
We hope you can now easily monitor GPU temperature in Windows 11 with the guide and fix the issue (if necessary).
If you have any queries regarding this, feel free to ask them in the comment section below.
Also Read: Downgrade from Windows 11 to 10 Without Losing Data.

