How To Fix – Time Machine Can’t Complete Backup On WD My Book
2 min read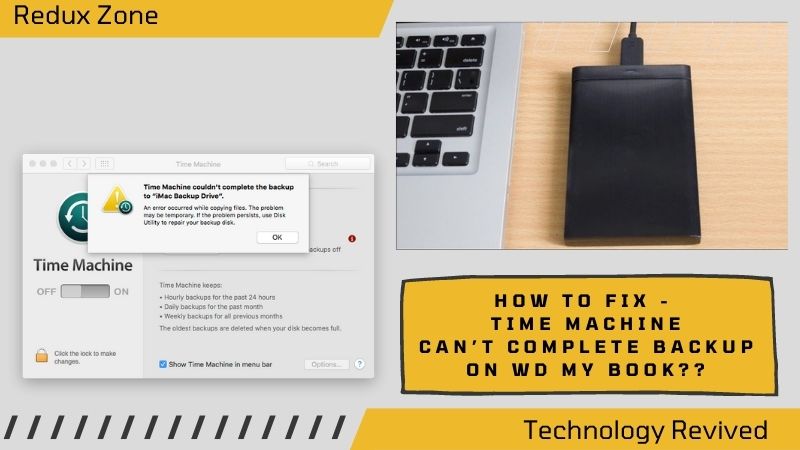
Read the Whole Blog to Get Acknowledged About How to Fix – Time Machine Can’t Complete Backup on WD My Book.
Time machine is the most used & powerful backup method that aids the users in a timely backup of the data from the computer to the preferred location such as the extra partition of the internal disk, hard drive, or time machine capsule.
In the meantime, you might get up with issues like time machine couldn’t complete the backup not enough space, the time machine couldn’t complete the backup an error occurred while copying files, & many issues like these that leads to time machine backup fails repeatedly.
Well, the reasons can be anything…But you don’t have to get panicked as we’ll be discussing elaborated solutions that will be telling the solutions about how to fix – Time Machine can’t complete backup on WD My Book.
However, before going further with the solutions, we’ll let you know that sometimes you might get all your data drained out, but you need your data back right!
Well, we have the best solution for you i.e., Stellar Data Recovery for Mac.
The Software also comes with a free version along with the paid ones, though with the free one you can only preview your files.
Initially, to check the reliability of the tool, you can download the free version from the below text…once you get confirmed about the Software, and then buy it from the official website.
The Best & Authentic Software to Restore Lost & Deleted Files….
>>Stellar Data Recovery Free Edition For Mac<<
Now, let’s move on to the decisive topic which is needed to be discussed….
Things You Need to Consider Before the Fixation Process
- Confirm whether the Mac Software is updated.
- Once reboot Mac & again check if time machine backup failed again.
- Make sure the device which is connected to a port on your Mac is switched on.
- Update the Airport Time Capsule, if you are using it.
- Make sure the drive firm is up to date if you are backing up to any external third party.
Note: If suffering from the glitch of sudden data loss, then here comes a solution for you.
Try Stellar Data Recovery for Mac to undelete the deleted or lost files.
Now, let’s move ahead to the solutions for Time Machine can’t complete backup on WD My Book.
How To Fix – Time Machine Can’t Complete Backup On WD My Book
After applying the updates Mac users often face the time machine not backing up files or the time machine couldn’t complete the backup two of the disks to back up have the same name.
So, here are the solutions, you can go for to encounter the issue of time machine backup fails repeatedly.
Close the Current Backups
If you are facing the issue of backup, then you can follow the instruction to stop the current backup.
The Steps To Do So Are:
Click on Apple, then System Preferences, after that click on the Time Machine icon.
If the backup is in the process you’ll see a message “preparing Backup”
Though, you can click on the (x) icon to stop the process of backup.
Stop Background Apps to Fix Time Machine Couldn’t Complete the Backup Not Enough Space
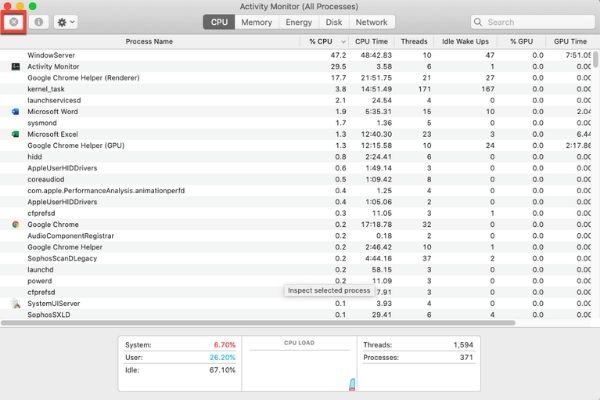
If your Mac is running slow due to the installed apps, then you really need to stop those lethargic apps to prevent the issue of space.
Moreover, you can check the Mac monitor to recognize those heavy apps running in the background.
Uninstall the WD Utilities Program

When you purchase the WD product, you are required to install the WD drive utility program on your Mac when you have to connect the product to it for the first time.
Although, there is no doubt that the program is quite helpful while installing & controlling the product…but it can also damage the function of the product.
Well, to get rid of this Time Machine can’t complete backup on WD My Book issue, you need to uninstall the WD drive program.
The Steps To Do So Are:
- Go to Finder>Library>Launch Demons.
- Now, navigate to WDPrivilegedHelper.plist, after that, the WD drive utilities helper window will get open.
- From the System Preferences>users & groups>login items, remove the preferences of the WD Drive utility helper program.
After removing the WD utility program, your time machine backup will run smoothly.
If you accidentally lost your data due to the crash in your Mac or jailbreak or maybe any other unsound reasons… Then you can easily opt for Stellar Data Recovery for Mac….the link to buy the Software is given below…
>>Buy Stellar Data Recovery for Mac<<
What to Do When Time Machine Couldn’t Complete the Backup Local Snapshot?
If you are bothered about how much storage the local snapshot is actually taking, then you can easily purge them & start the time machine again after turning it off.
This way, the time machine will start saving snapshots again.
Moreover, if you are considering of deleting any specific snapshot, then you can follow the below steps.
The Steps to Delete Snapshot Are:
- Open the Terminal on your Mac.
- Enter the below command in the Terminal
{ tmutil listlocalsnapshots /}
- Now, press Enter
Follow the Steps to Delete the Local Snapshots
- Open the Terminal on your Mac.
- Now, enter the following command into the terminal
- The 2019-04-15-082107 is replaced by your file.
- After that, click on
- Now, enter your administrator password.
Through this method, the specified snapshot will get deleted on your Mac.
Well, along with this…There also comes a situation when the time machine couldn’t complete the backup two of the disks to back up have the same name.
What would you do then? Well, we have the solution…you just have to follow the below instructions.
Fix Time Machine Couldn’t Backup Due to Same Name
As you already know, Time Machine helps in backing up the files & restores the data that you tend to lose.
But, sometimes due to the same name, it shows the issue. So the solution is below…
Rename the Main Disk
You can simply rename one of the disks, & then check whether the issue is gone or not.
Moreover, sometimes the second disk also gets renamed as well, but that’s not the issue, you can try to backup your data & see the results.
How to Fix the Issue of Time Machine Couldn’t Complete the Backup an Error Occurred While Copying Files?
If you are troubleshooting with the issue of the time machine not working while copying files, & hence want to know the solutions for how to fix – Time Machine can’t complete backup on WD My Book, then read the steps below…
To Resolve the Error
- Connect your Time Machine drive to your Mac.
- Turn off the time machine by selecting “none” in the preferences for the backup disk.
- Now, open your console.
- After that, click on “system.log”
- Press “clear display”
- Turn on the time machine by opening “time machine prefs” & then selecting your disk drive.
- Watch out for the system log for errors that look like 12:14:14 computer-name.
System/Library/CoreServices/backupd[905]: Error: (-36) SrcErr:YES Copying /path/to/file/file.name to (null)
- Remove the files.
- Repeat steps 2 & 6 to restart the machine.
If Suffering From Frequent Data Loss, & You Are Not Even Able to Restore the Data With the Time Machine, Then Without Doing Any Further Delay…Just Go For Stellar Data Recovery for Mac…The Rest About the Software. You’ll Know Yourself After Using it…
>>Stellar Data Recovery Free Edition For Mac<<
Fixation Solution for Time Machine Couldn’t Complete the Backup to My Passport for Mac
- Enter the repair mode by turning off the Mac, and then immediately after pressing the power button to turn it back on, hold down Command-r (⌘ + r) for a period of time until the Mac does not display the power bar. Scrolling instead asks you one or two questions, such as “language?” Please note that you must shut down, not just restart, because you cannot run Command-r fast enough during the restart.
- After entering the repair mode, you will see a list of 4 options. Select Disk Utility…
- Select your main disk (usually Macintosh HD) and click First Aid.
- After that, Select the external WD drive you want to use for the backup and click “Erase Drive” (assuming you want to use the entire drive as a backup, otherwise you will need to call Apple for different instructions). Choose a name and want to format it it as “APFS” (not encrypted or case sensitive) using GUID mapping. That is very fast.
- With the external WD drive still selected, click “First Aid” and say “OK” to wipe the drive. Exit Disk Utility and restart.
- Start Time Machine, delete the existing backup disk selection (especially if it is the disk you just erased) and then reselect the external WD disk you just performed First Aid as the backup disk.
- Allow the first backup to complete. Wait a moment to confirm that subsequent backups have also been completed successfully.
Well, this might help if you are getting the message like “time machine couldn’t complete backup for Mac.
The solution to Fix When Time Machine Backup Not Showing Up In Recovery with Stellar
If you face the issue of data loss due to accidental formatting or time machine not showing up in the recovery, then you are at a very big risk of losing your data.
Though, with Stellar Data Recovery for Mac, restoring the files is not a big issue.
Well, the Software is very affordable & also comes with the trial version, through which you can scan & preview your recoverable files.
Comprehensive Features of Stellar Data Recovery for Mac
- Easily restores the Mac files from the emptied bin.
- Recovers the data from deleted Mac partitions.
- Comes with a user-friendly interface that makes it handy to use.
- Allows the recovery of the files from Dead Macs.
- Comes with a hard drive monitoring feature that helps in tracking the temperature of the file.
- Provides Unicode recovery & also supports multiple file formats.
Here’s How you Can Recover the Data on Mac with Stellar Data Recovery for Mac
- Buy Stellar Data Recovery for Mac.
- Now, launch the Software, & then select the type of data you need to recover.
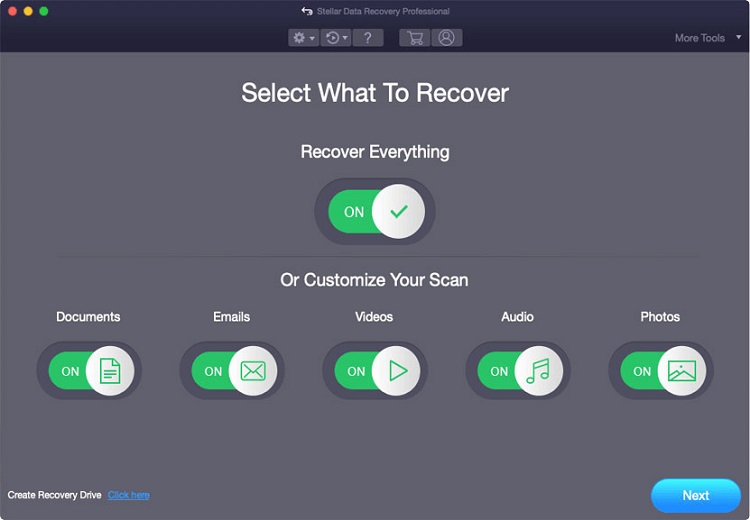
- Afterward, click on next.
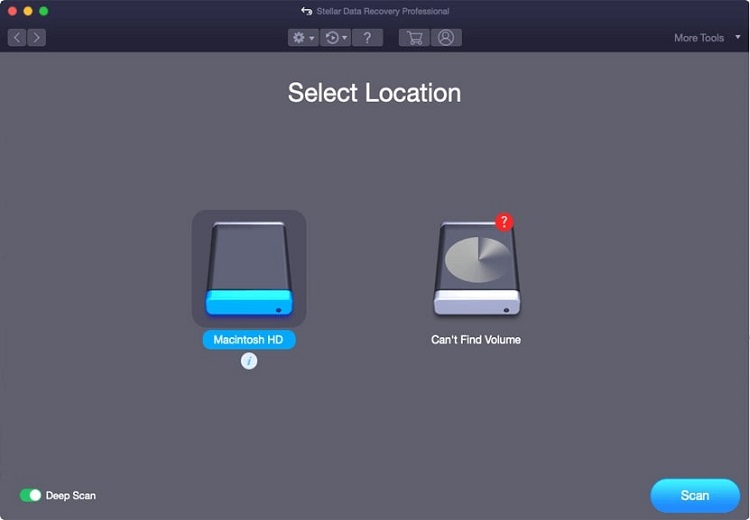
- Select the storage where you want to keep your recovered files.
- After that, click on Preview.

- At last, select the file you want to recover, and then click on
So, with these simple steps, you can easily recover the data when Time Machine can’t complete backup on WD My Book.
The Conclusion
Well, regular backups with the Time machine are good…but what if it gets an issue& you don’t have any backup plan.
Though, to avoid that kind of situation, you can simply go for Stellar Data Recovery for Mac.
Don’t get panic if you ever come into the situation of losing data, you can easily have them back with the Software.
Moreover, we’ll advise you to never go for any crack version & try to recover your data manually; you might end up getting in more big trouble.
Now, we wrap up the blog here, hope you have understood how to fix – Time Machine can’t complete backup on WD My Book.
Nonetheless, if you still have any further queries, just write them in the comment section below.